This post includes a few separate DIY projects to make my whole Wishes and Advice Card set-up.
Wait.
Maybe I should back up a bit because I don't think I've posted about this before.
Ok.
So.
I decided some time ago that I wanted to do something just a little different for my welcome table, particularly I wanted to find an alternative to the traditional guest book. I found a few ideas online and ultimately decided to do my own take on the Wish Tree.
Partly, I liked the idea because a couple of years ago, as part of my Christmas gift for him, I made a jar of inspirational quotes for Christopher. I found lots and lots of quotes that I thought he would like - with a variety of topics and tones - and put them in a jar (on small pieces of card stock) for him to take on a [semi-]daily basis.
The gift went over well, so when I stumbled upon the ideas for the wishes and advice trees and such, I mixed in my own flavor by deciding on having a Wishes and Advice jar.
The idea is that our guests will take a blank card and write either a wish or advice for us as we begin our marriage. I liked this idea instead of a guest book because this is more interactive, creative, and hopefully will lead to a more treasured keepsake than a traditional guest book.
With that in mind, the idea resulted in creating several mini-projects:
(1) the cards themselves
(2) the jar
(3) an explanatory sign
and
(4) pens
Up first: the cards themselves. I created a template in Word, but it can easily be done in Publisher so that fours cards fit on each page (approx 3" x 4"). I found a pretty floral image online (like this one), adjusted the image so that it was a watermark and set it as the background. Then I decided on the wording (after a few attempts) and added it in. The result:
I used a beige card stock, printed about 160 (cards not pages), and used my really awesome paper slicer to cut them out and voila! the task is done! And without any finger cutting.
Second task (and arguably the most fun): the jar itself. I used a mason jar that I'd procured at some point in the past, small paintbrushes, and acrylic crafting paint (and one small piece of ribbon). I painted the design I wanted, wrapped a bit of gingham ribbon around it and it was done. I tried not to worry too much about getting the paint perfect since I'm not an artist and it really wouldn't matter anyways. Result:
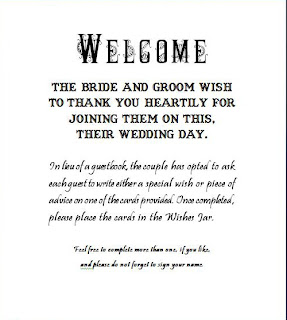
Third is the sign: I figured that I should probably explain to my guests what the whole thing was about. Using a cheap frame, I added a matting page using the same floral print from the cards and printed that on a piece of blue card stock, before adding the explanatory message. I took a little while to decide on the wording and the fonts to make both clear and as concise as possible:
For the fonts, I used Font Paradise which has a really great program that makes it super easy to actually use the fonts you've downloaded. And yes, it's totes legit and not a virus.
Fourth were the writing implements: take one part ballpoint pens, one part silk flowers, and one part florist tape. Cut the flowers so that the stem runs along the barrel of the pen; wrap the floral tape around and around until the whole pen is covered. The backside of the tape will be sticky, but that will go away with time.
The total set-up:
I'm pretty satisfied. :)


No comments:
Post a Comment